Background
A common question that arises after moving mailboxes to Office 365 is, “How do I restrict access to certain conference rooms?” Even though the question is straightforward, the answer can be complex depending on how your organization wants to restrict certain conference rooms. To outline the options for managing conference room restrictions, I have written a three-part series, which will cover the following configurations:
- Free\busy permissions
- Definitions for who can schedule conference rooms
- Using Address Book polices with conference rooms
Part 1 of this series will cover how to modify the free\busy permission and its impacts on booking a conference room.
Lab Configuration
Before diving into any solutions, let’s explore how our Office 365 tenant is configured.
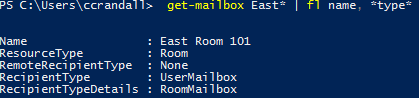
There are two conference rooms, East Room 101 and East Room 200. East Room 101 is an executive conference room. East Room 200, however, should be available to all employees. To validate the mailbox type of East Room 101, the command get-mailbox East* | fl name, *type* was run.
There are two accounts that will be used during testing:
- minetrej is standard user
- chcrand is an executive user
There are two rooms that will be used during testing:
- East Room 101 is a standard conference room
- East Room 200 is an executive conference room
Outlook 2016, with the latest updates as of March 2017, was used for all solutions below.
Optional – Create Room List
Although the creation of a room list isn’t a requirement, I generated one for testing purposes. The results of changing the free\busy permissions will impact conference rooms that are returned in the room list.
To create a room list, a distribution group is created and room mailboxes are added as members of the designated distribution group. The following section reviews the steps to create a room list.
To get a list of all room mailboxes in your organization, run the command below. Normally we would use filters when creating a room list.
Note: Using the filter parameter, complex searches can be used to build a list of room mailboxes. More information on filters can be found here.
$RoomAlias = Get-Mailbox -RecipientTypeDetails RoomMailbox | select -ExpandProperty Alias

The command below will create a new distribution group with a type, Roomlist. All room mailboxes are added as members of the EastRoom distribution group.
New-DistributionGroup -RoomList -Name ‘EastRoom’ -Members $RoomAlias

To validate group membership, use the get-group command.
Get-Group eastroom | fl Name, RecipientTypeDetails, members

Free/Busy Permissions
Free/busy permissions can be set on resource mailboxes that define the sharing level of free/busy information. There are five different levels of free/busy sharing:
- Not shared
- Can view when I’m busy
- Can view titles and locations
- Can view all details
- Can edit
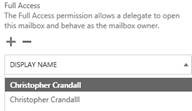
To change the free/busy information on a resource mailbox, navigate to Exchange online > Recipients > Resource > Select Resource Mailbox
> Edit > Mailbox delegation. Assign an admin account under full access to the mailbox.
Note: allow 15 minutes for the full permission change to take effect.
Note: Make sure the account that is provided full access has a mailbox in Exchange Online
To perform the same actions via PowerShell, use the command below:
Add-MailboxPermission -Identity <MailboxIdParameter> -Owner <SecurityPrincipalIdParameter> <COMMON PARAMETERS>
Example:
Add-MailboxPermission -Identity “East Room 200” -User chcrand -AccessRights FullAccess -InheritanceType All

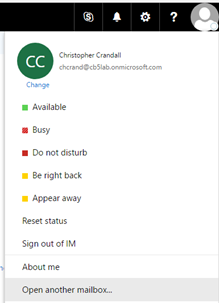
Using your admin account, log into Outlook on the Web (OWA). In OWA, select the profile in the upper right hand corner > Open another mailbox
Type the name of the resource mailbox in > click open

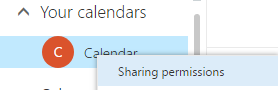
Click on Calendar tile
> right click on Calendar > Sharing permissions
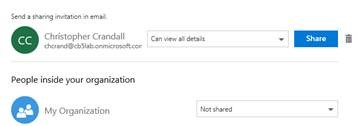
Set the sharing permission to Not shared for the organization and added Can view all details for the executive account (Christopher Crandall) to be able to see full details.
To assign free\busy permission via PowerShell use the command below:
Add-MailboxFolderPermission ResourceMailbox:\Calendar –User admin account -AccessRights AvailabilityOnly
Example:
Add-MailboxFolderPermission eastroom101@cb5lab.onmicrosoft.com:\Calendar –User chcrand@cb5lab.onmicrosoft.com -AccessRights AvailabilityOnly

Results
Now that the sharing permissions have been set, we can validate our configuration via OWA and Outlook for executive and standard users and room mailboxes.
Results from OWA with Standard Account
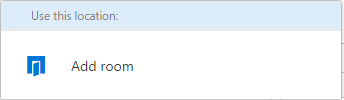
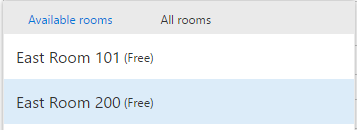
Creating a new appointment with the standard account (minetrej), click on Add room
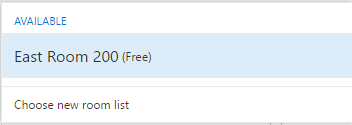
Click your room list (EastRoom)

Only East Room 200 is shown. So the executive room is not shown in the room list
If you create a new appointment with the standard account (minetrej), the free\busy information is grayed out
Results from OWA with Executive Account
Creating a new appointment with the executive account (Christopher Crandall), click on Add room

Click your room list (EastRoom)

Free\busy information is shown for both rooms
When creating a new appointment with the executive account (Christopher Crandall), full information is displayed in Free\Busy.

Results from Outlook with Standard Account
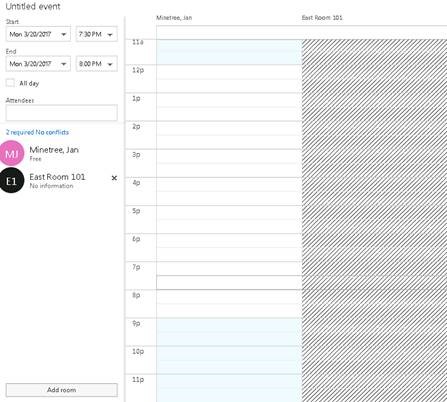
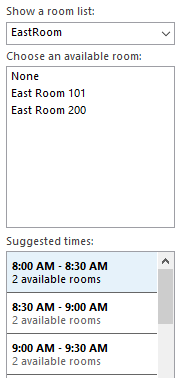
When creating a new appointment with the standard account (Minetree, Jan), no Free\Busy information is displayed.

For standard user accounts, under suggested times, one is marked as unknown and one is marked as available.
Note: This seems like a bug. I only tested the configuration with two accounts but, both experienced the same problem.


Results from Outlook with Executive Account
Free\busy information is displayed for both room mailboxes when using the executive account.
When creating a new appointment with the executive account (Christopher Crandall), Free\Busy information is displayed.
